Setup & Edit Webhooks
This guide explains how to set up, configure, and manage webhooks in your Clearout App so you can automatically receive real-time notifications when important events occur, such as email validation completions, email finder results, or form guard triggers. You'll also learn how to select events, secure your webhooks, and test your integration for reliability.
Accessing Webhooks
To access webhook settings in Clearout:
- Log in to your Clearout App
- Navigate to the Developers section in the main menu
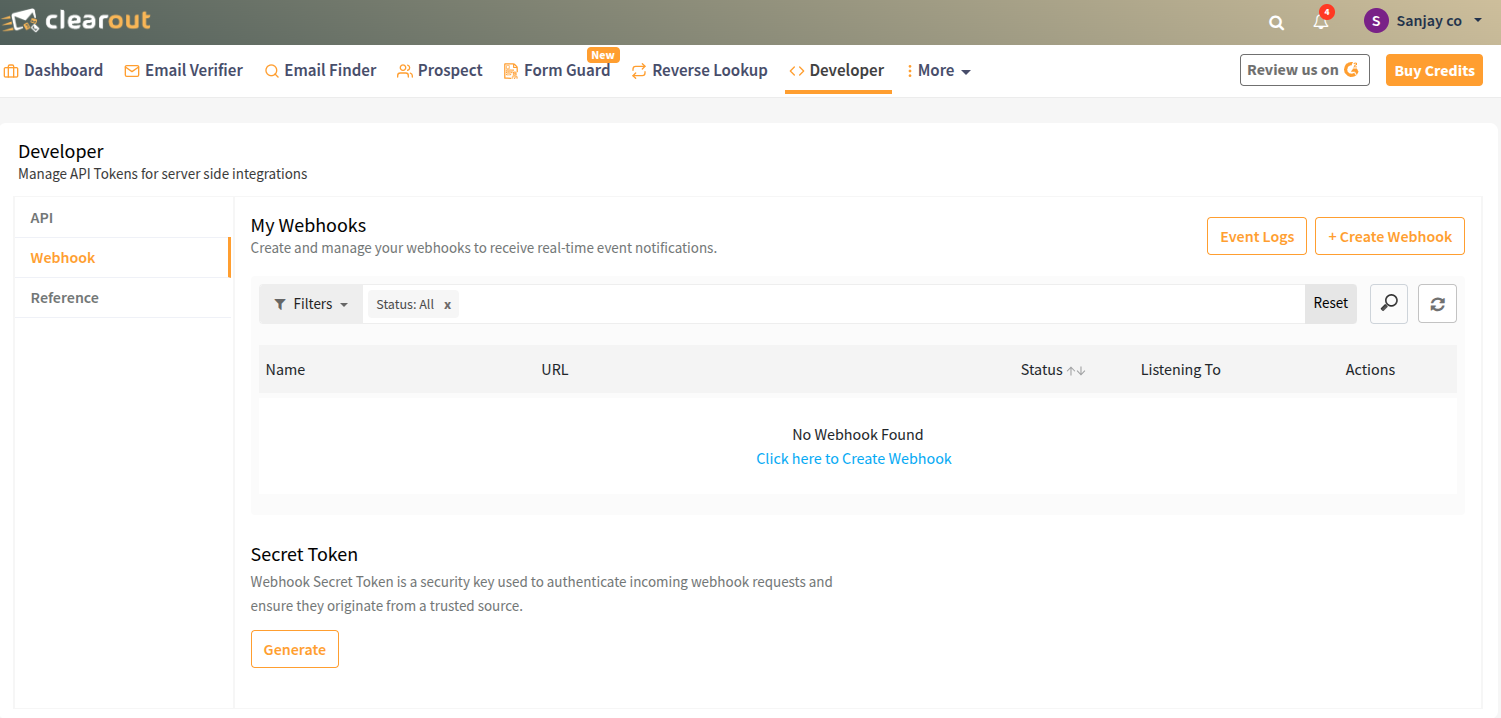
- Click on Webhook to access webhook management
Creating a Webhook
To create a new webhook:
- Click the Create Webhook button
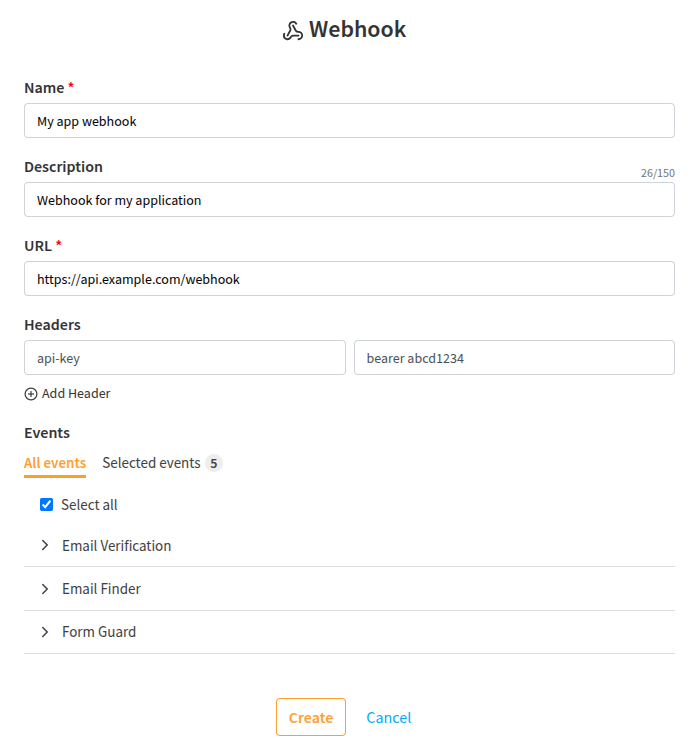
- Fill in the webhook configuration form
- Select the events you want to subscribe to
- Save your webhook configuration
Webhook Configuration
When creating or editing a webhook, you'll need to configure the following fields:
Basic Fields
- Name - A descriptive name for your webhook
- Description - Description of the webhook's purpose (150 character limit)
- URL - The HTTPS endpoint where webhook notifications will be sent
Custom Headers
You can add custom headers to your webhook requests:
- Click Add Header to add a new header
- Specify the Key and Value for each header
- Common use cases include authentication headers or custom identifiers
Header Examples
You might add headers like Authorization: Bearer your-token or X-Custom-ID: your-identifier for authentication or tracking purposes.
Event Selection
Events are organized by service and displayed in a grouped checkbox format. You can view all events or only selected ones using the tabs.
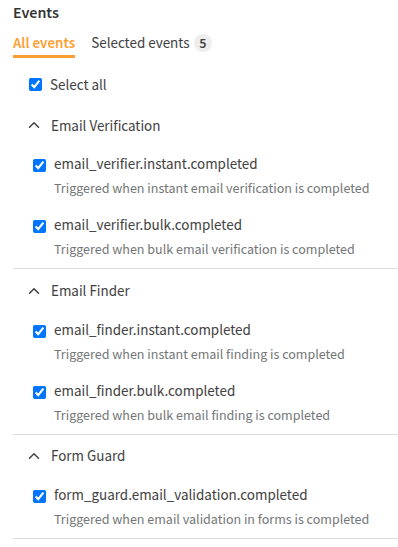
(Email Verification, Email Finder, Form Guard)
Event Selection Tips
Use the "Select all" checkbox to quickly select all available events, or expand each service section to choose specific events. For detailed information about each event and their payloads, see our Webhook Events & Payloads page.
Secret Token
The secret token is used to verify that webhook requests come from Clearout. It's generated at the account level and shared across all webhooks.

Generating Your Secret Token
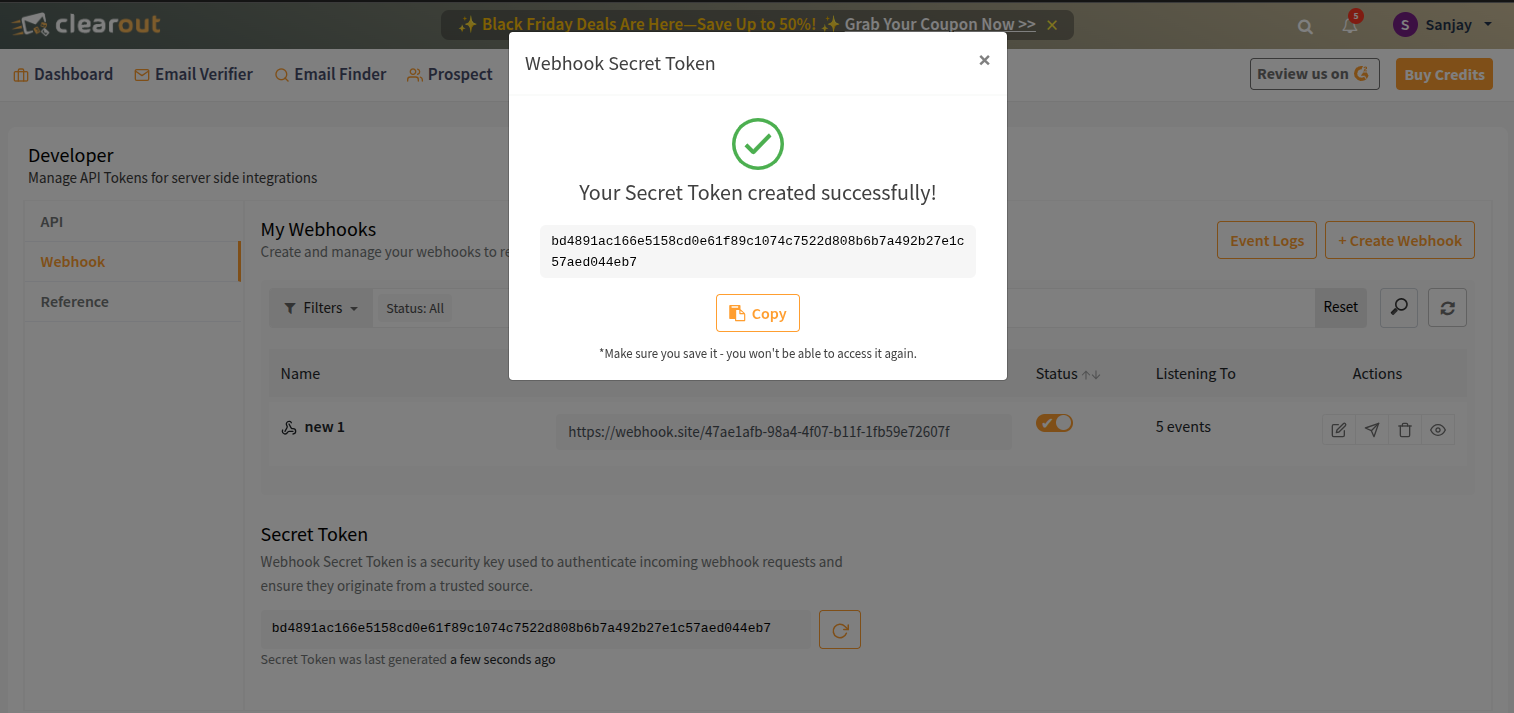
- In the webhook dashboard, scroll down to the Secret Token section
- If this is your first time, click the Generate Token button to create your secret token
- Important: Copy the generated token immediately as it will only be visible during generation
Rotating Your Secret Token
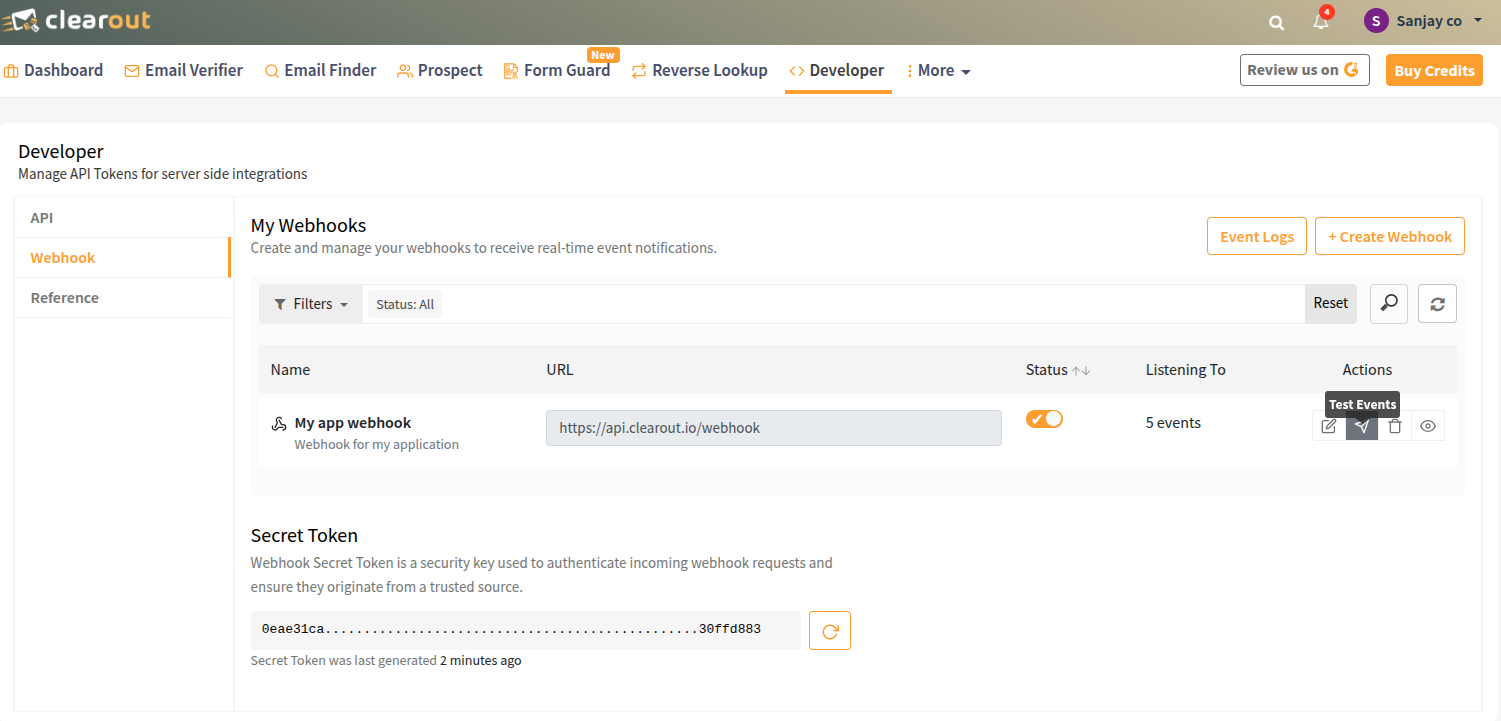
- Click the rotate button (circular arrow icon) next to your current token
- A new token will be generated and displayed
- Copy the new token immediately as it will only be visible during generation
- Update your webhook endpoint to use the new token
- The dashboard will show when the token was last updated

Important
The secret token is only visible during generation or rotation. Make sure to copy it immediately and store it securely. Use it to verify webhook signatures as described in our Validate Deliveries guide.
Managing Webhooks
Once you've created webhooks, they appear in the "My Webhooks" table where you can manage them using the action buttons:
Available Actions
View Event Logs
View detailed delivery history, response codes, and JSON payloads for all webhook events. Shows success/failure status and timestamps.
Test Events
Send test payloads to verify your webhook endpoint is working correctly. Select from available event types to simulate real webhook deliveries.
Edit Webhook
Modify webhook configuration including name, description, URL, custom headers, and event subscriptions.
Delete Webhook
Remove the webhook configuration permanently. You'll be asked to confirm the deletion before it's removed.
Webhook Table View
The webhook dashboard displays your configured webhooks in a table format with the following columns:
- Name - Your webhook name with description below
- URL - The endpoint URL where webhooks are sent
- Status - Toggle switch to enable/disable the webhook
- Listening To - Number of events the webhook is subscribed to
- Actions - The four action buttons described above
Testing Webhooks
You can test your webhook configuration directly from the dashboard:
- Click the Test Events button (paper plane icon) for any webhook
- Select the event type you want to test
- A sample payload will be sent to your webhook URL
- Check your endpoint to verify the payload was received correctly
Local Testing
For local development, use tools like ngrok to expose your local server with HTTPS. This allows you to test webhooks on your development environment.
Next Steps
Once your webhook is configured, learn about the event payloads you'll receive and how to validate webhook deliveries for security.